Getting Started
*In order to make modifications to the system routing configurations, you need to ensure that you have access to your management console. If you do not have access to this console please contact the designated admin on the account to gain further information regarding your authorization level to system functions.
What are 3CX Control Extensions?
Control Extensions are system extensions that allow you to manually control the routing of your calls during and after business hours.
1. Log in to your management console. Click the Extensions tab, on the top left of your screen.

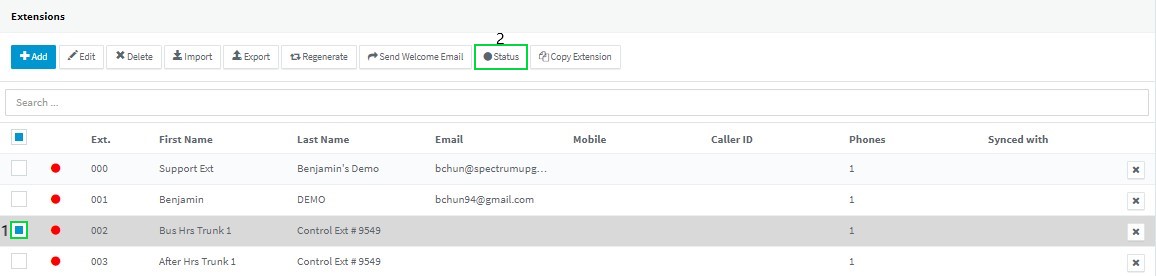
2. The Extension page will display all the extensions on the company’s PBX system. There you will find extensions with the last name “Control Ext” followed by a “#” sign and the last four digits of the number it controls. Notice that there are 2 control extensions per number. One controls the number during office hours, and the other controls the number after hours. The first name of the control extension identifies to which it corresponds.
In this example, we will show the routing of ext 002, shown below as Control Ext#9546, during Office Hours. Open that extension by checking the box beside the extension number and then clicking the edit button at the top of the page.

3. Once inside the extension you will be able to see all the properties and possible configurations for that single extension. Click the “Forwarding Rules” tab, at the top of the page.

4. Each extension has 5 possible statuses, “Available”, “Away”, “Do Not Disturb DND”, “Lunch” and “Business Trip/Special Exception”. Each can be configured to behave differently. To modify a status, click on the dropdown menu and select the status.

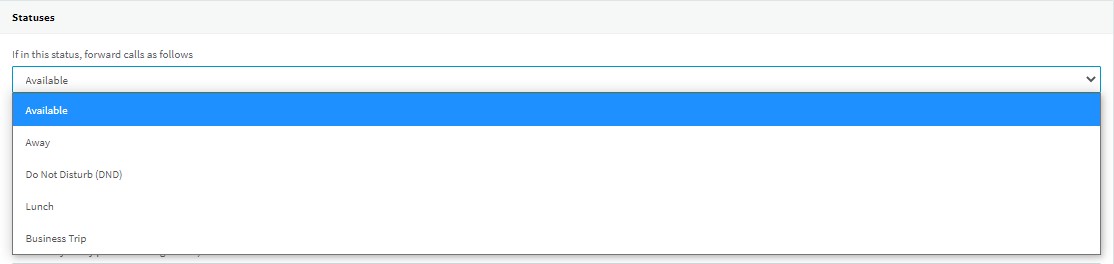
For this guide, we will focus on setting up the “Available” status. Once the “Available” status is selected below there will be a subheading labeled “Internal Calls” (1 see below).
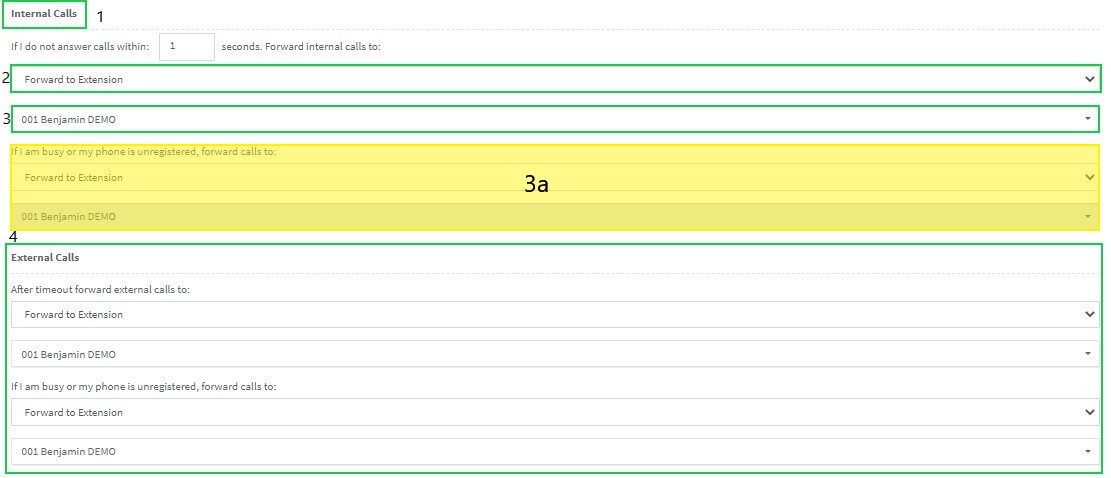
Here are the forwarding options and it’s function. (Section 4)
- Forward to Voicemail — Forwards call to voicemail to current extension VM box ( Do Not Use this Option).
- Forward to Extension’s Voicemail — Sends call to the voicemail box of the extension specified in the box labeled (3).
- Forward to Mobile — Sends call to the mobile number specified under the General Tab of the Extension.
- Forward to Extension — Sends call to the extension specified in the box labeled (3).
- Forward to Number — Forwards calls out to the number specified in the box labeled (3).
- End Call — Ends Call.
Once boxes (2.) and (3.) are completed ensure that section ( 3a.), as well as section (4.) shown in the image above, follows the exact configuration. Once done navigate to the top of the page and click on “ok” to save the changes. Keep in mind that while inside the extension page you can select another status like “Away” and configure that specif status behavior.
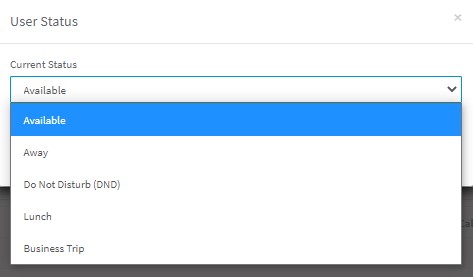
Once back on the Extensions page to change the status of the control extension (in this example “Ext 002…Control Ext#9546”) click the checkbox beside the extension(1) and then click on the status button (2) at the top of the extensions page.
Under the Current Status section, use the drop-down list to select the status configuration that you would like to enable. Once selected, Click the X to close the box. The new configuration will be in effect.
This Configuration applies to Business Hours Control Extensions as well as After Hours Control Extensions.